The following steps will guide you through the configuration of a new Enterprise application within Microsoft Entra (formerly Azure Active Directory).
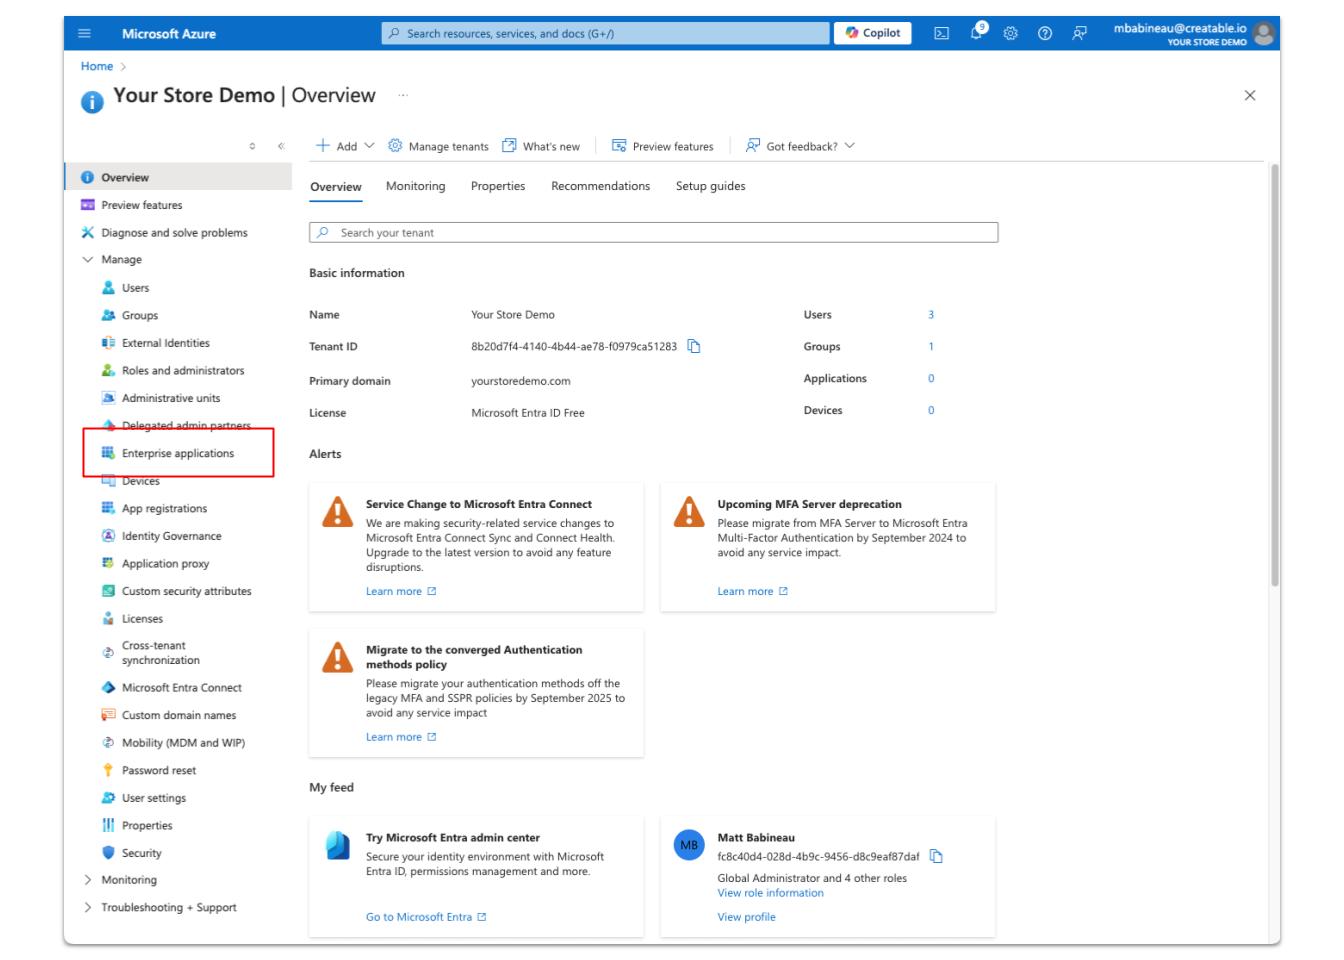
First, log in to your Azure portal and navigate to Microsoft Entra ID > Enterprise applications.
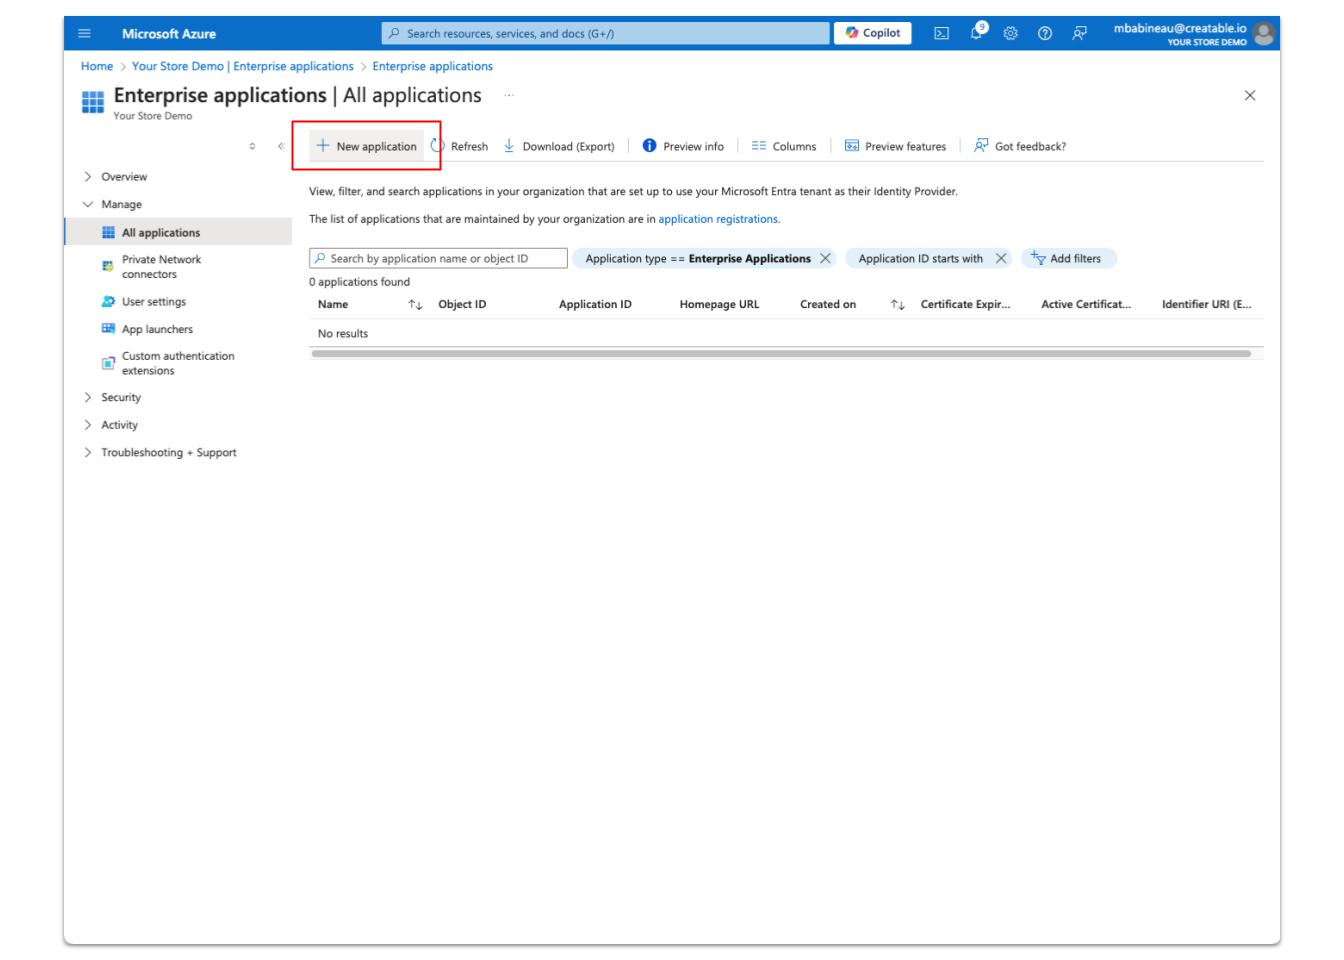
Next, click on “New application”, this will create the new Enterprise application that will be used for SSO.
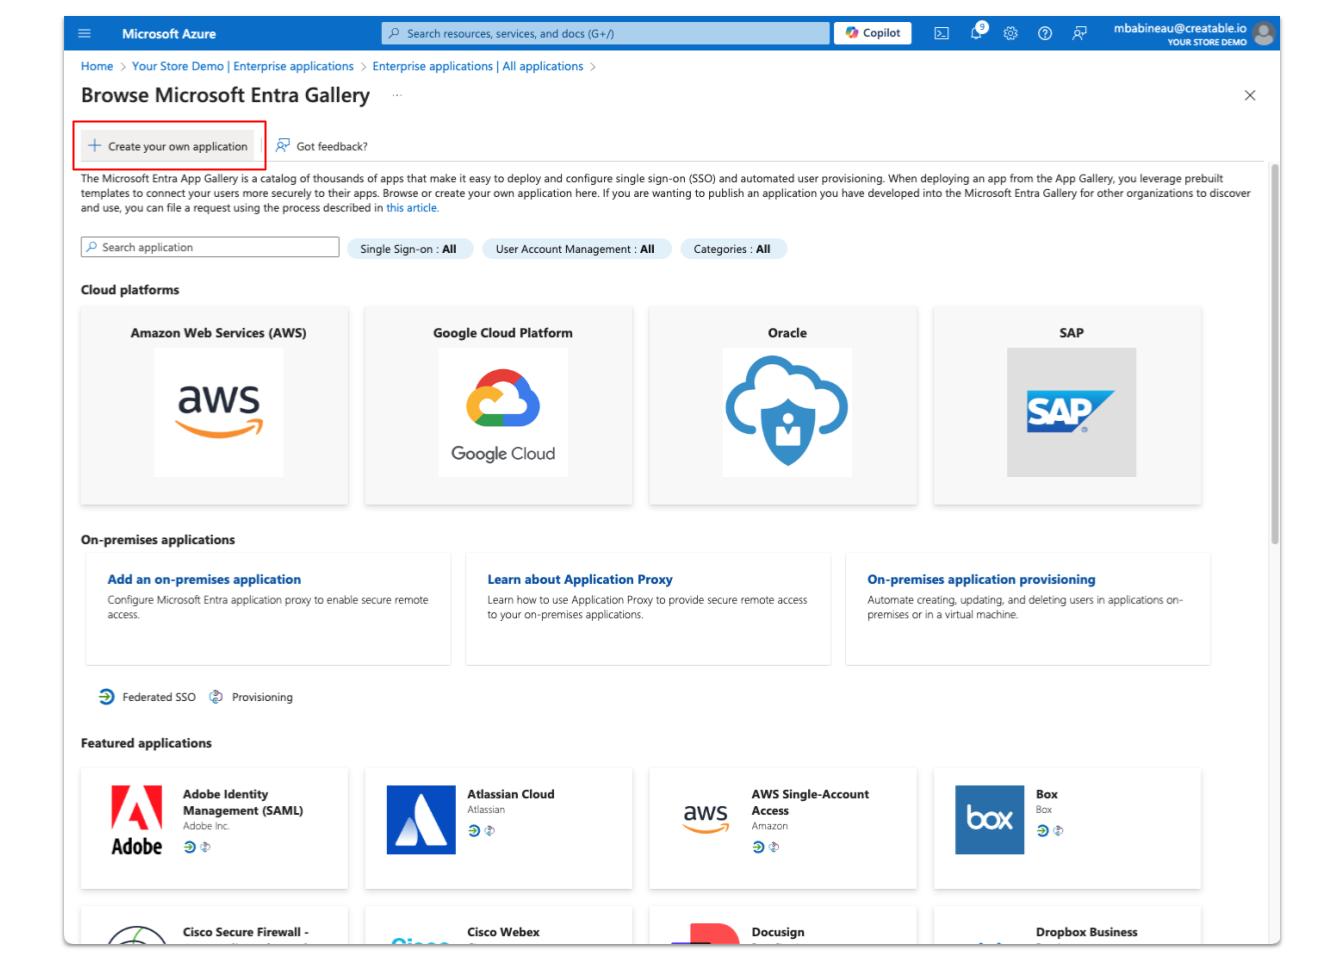
Now, click on the button “Create your own application”.
Enter a name for the application.

Ensure the option “Integrate any other application you don’t find in the gallery” option is selected.
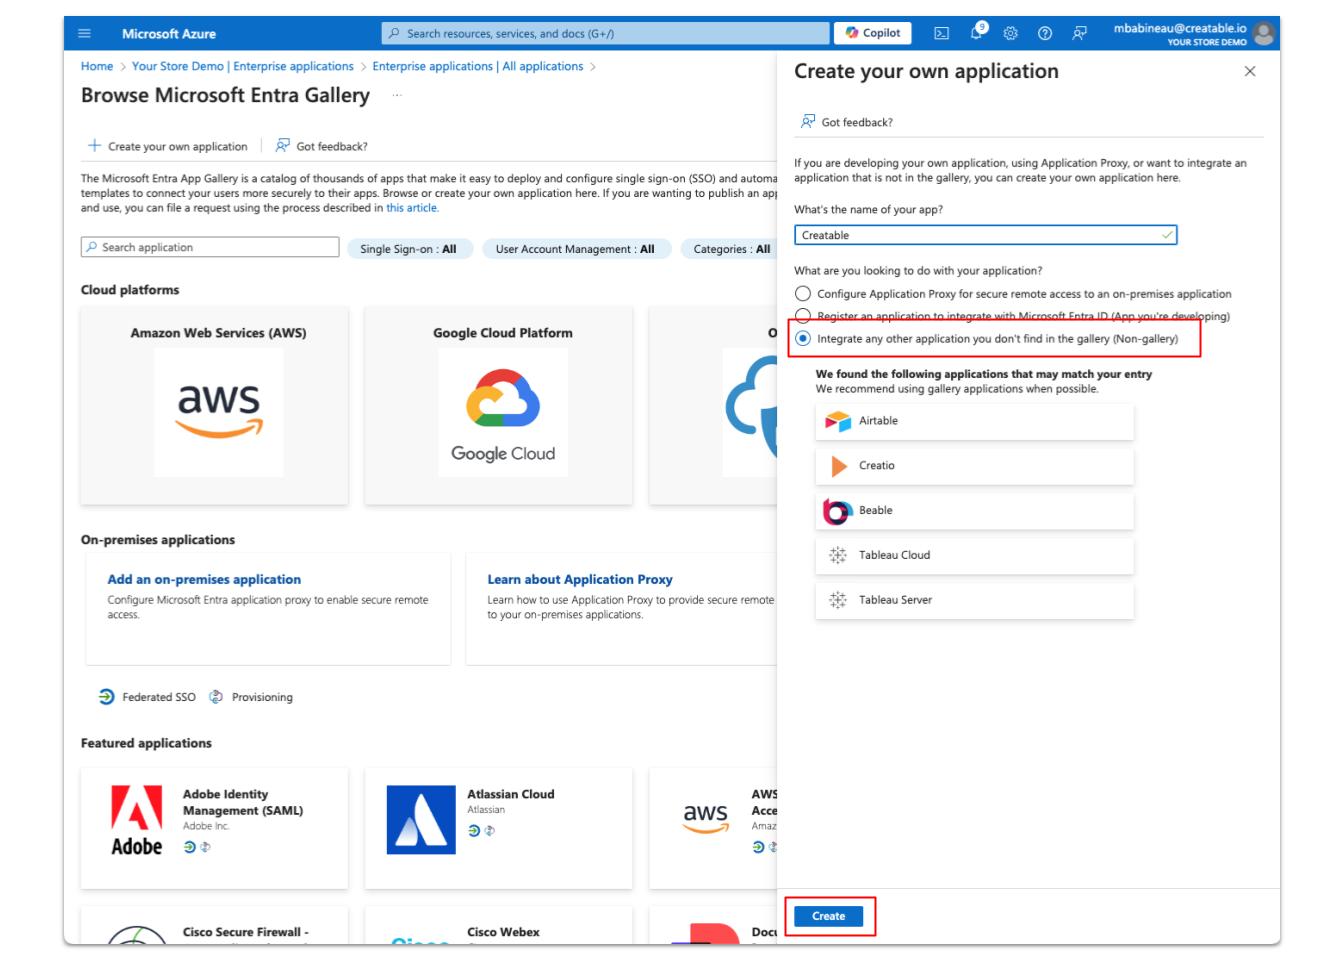
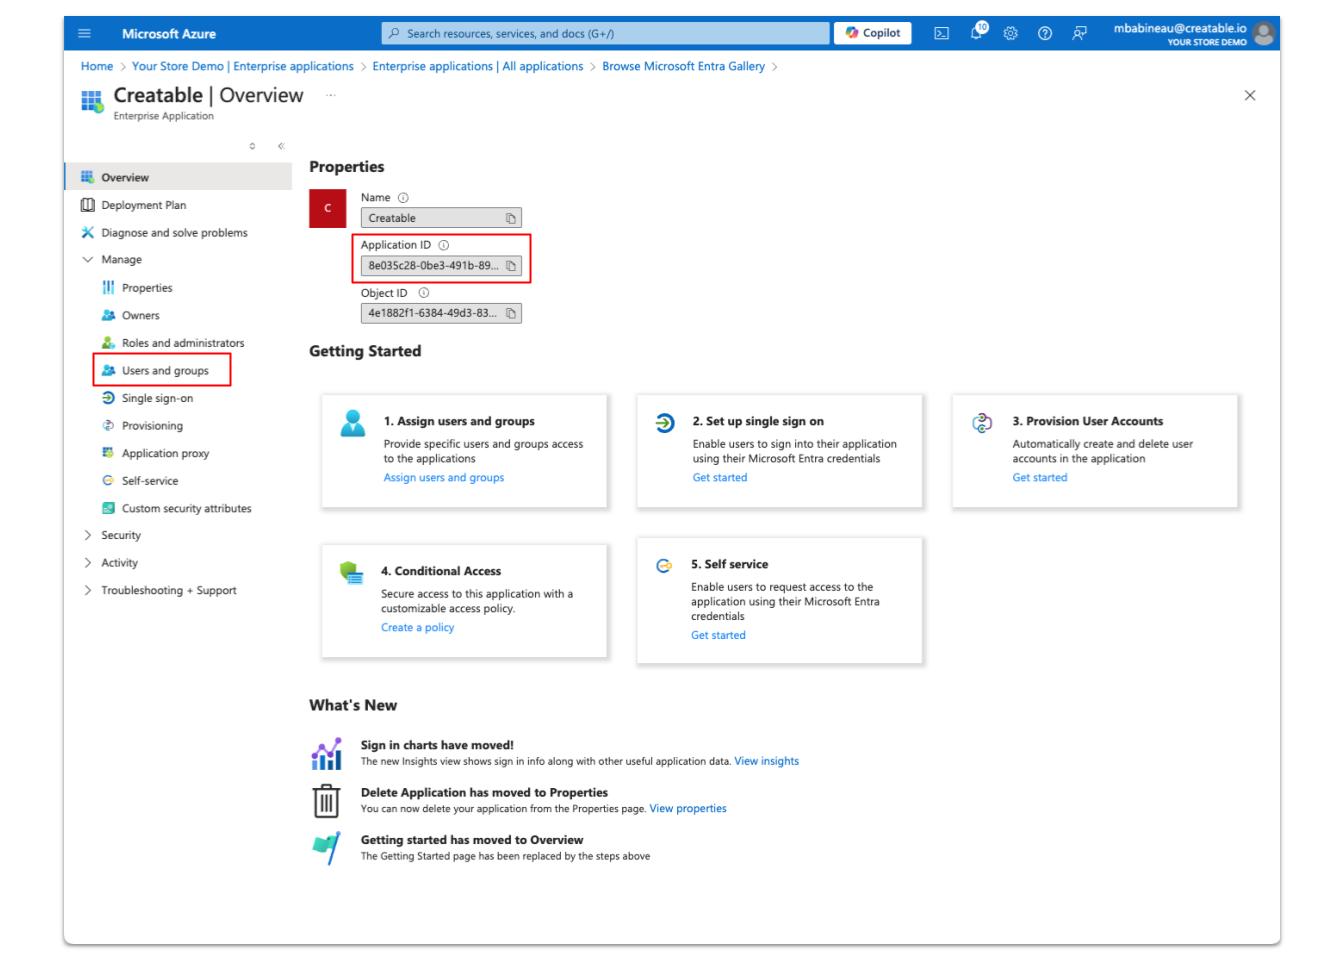
Click “Create” to create the application. You will be directed to the application’s Overview screen.
On the Overview screen, copy the Application ID. This is used in the Creatable IdP URL configuration for the URL parameter `client_id`. Provide this value to Creatable.
At this point, you can also configure any users/groups who will be accessing the application. For testing purposes, ensure there is at least one user/group configured that will be used to test the SSO flow.
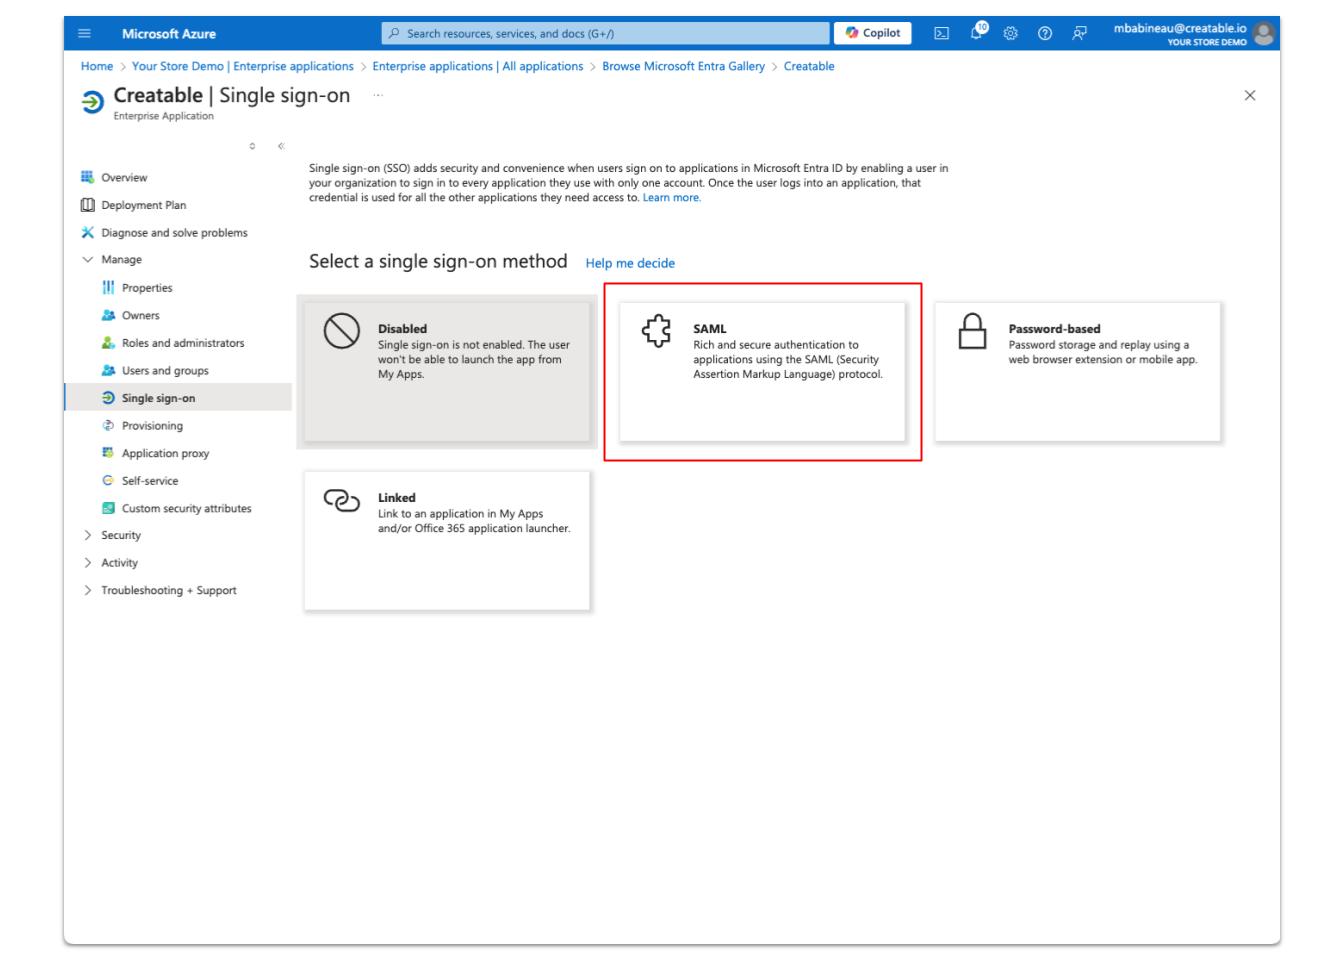
Click “Single sign-on” in the menu on the left.
Choose the “SAML” option.
This will load the setup screen for Single Sign-On with SAML. Under the first section “Basic SAML Configuration”, click “Edit”.
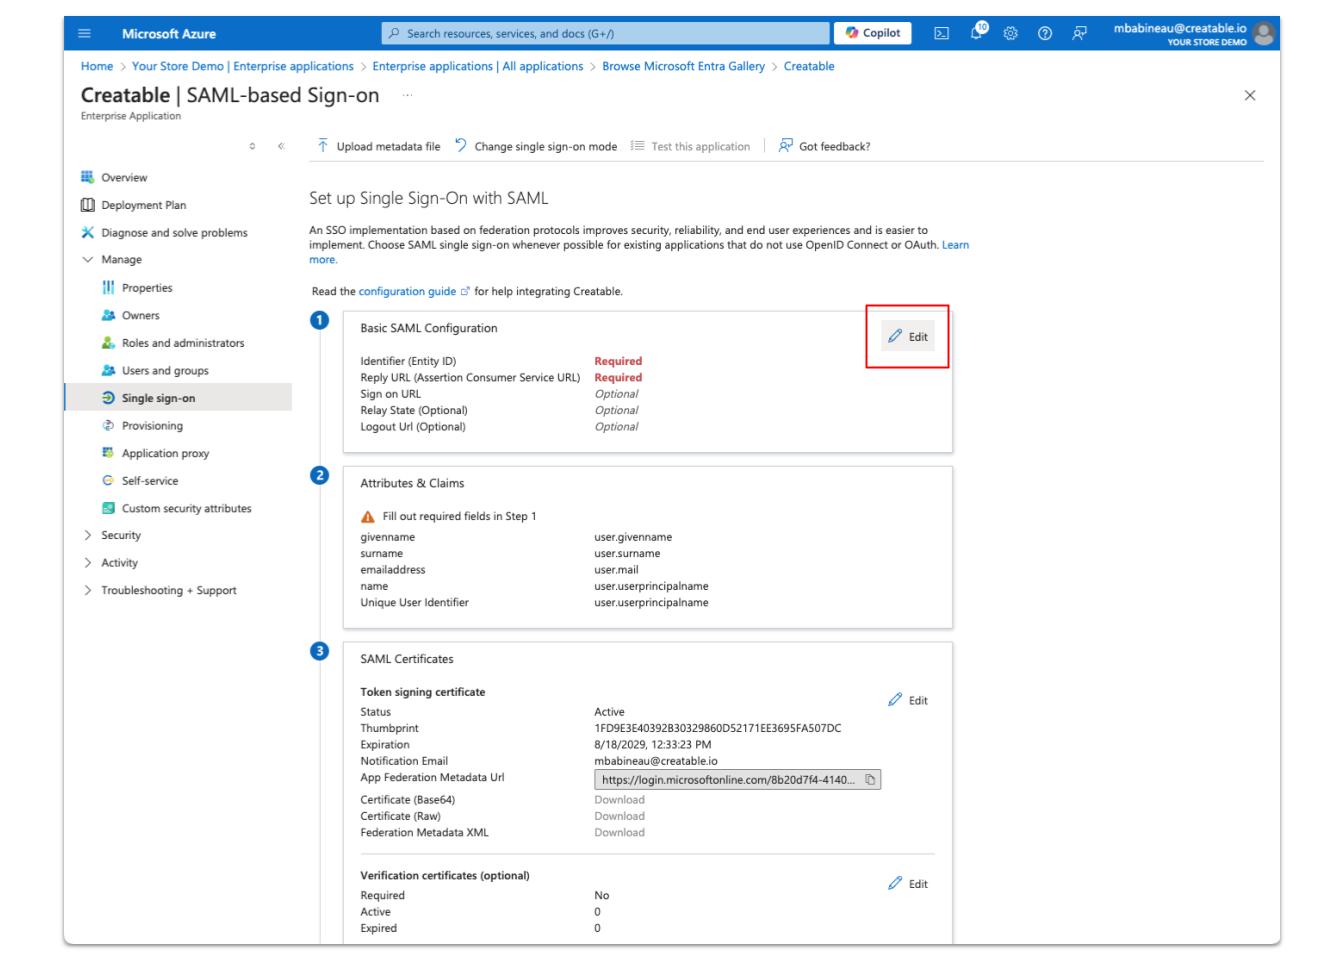
We are now going to add an Identifier and Reply URL.
Under the Identifier (Entity ID) section, click “Add identifier” and enter an identifier name.
Under the Reply URL section, click “Add reply URL”. This URL comes from the Creatable dashboard and can be provided to you by Creatable.
Click “Save”, this will close the Basic SAML Configuration panel.

Under the Attributes & Claims section, click “Edit”, this will open the Attributes & Claims panel.
Click “Add new claim”.
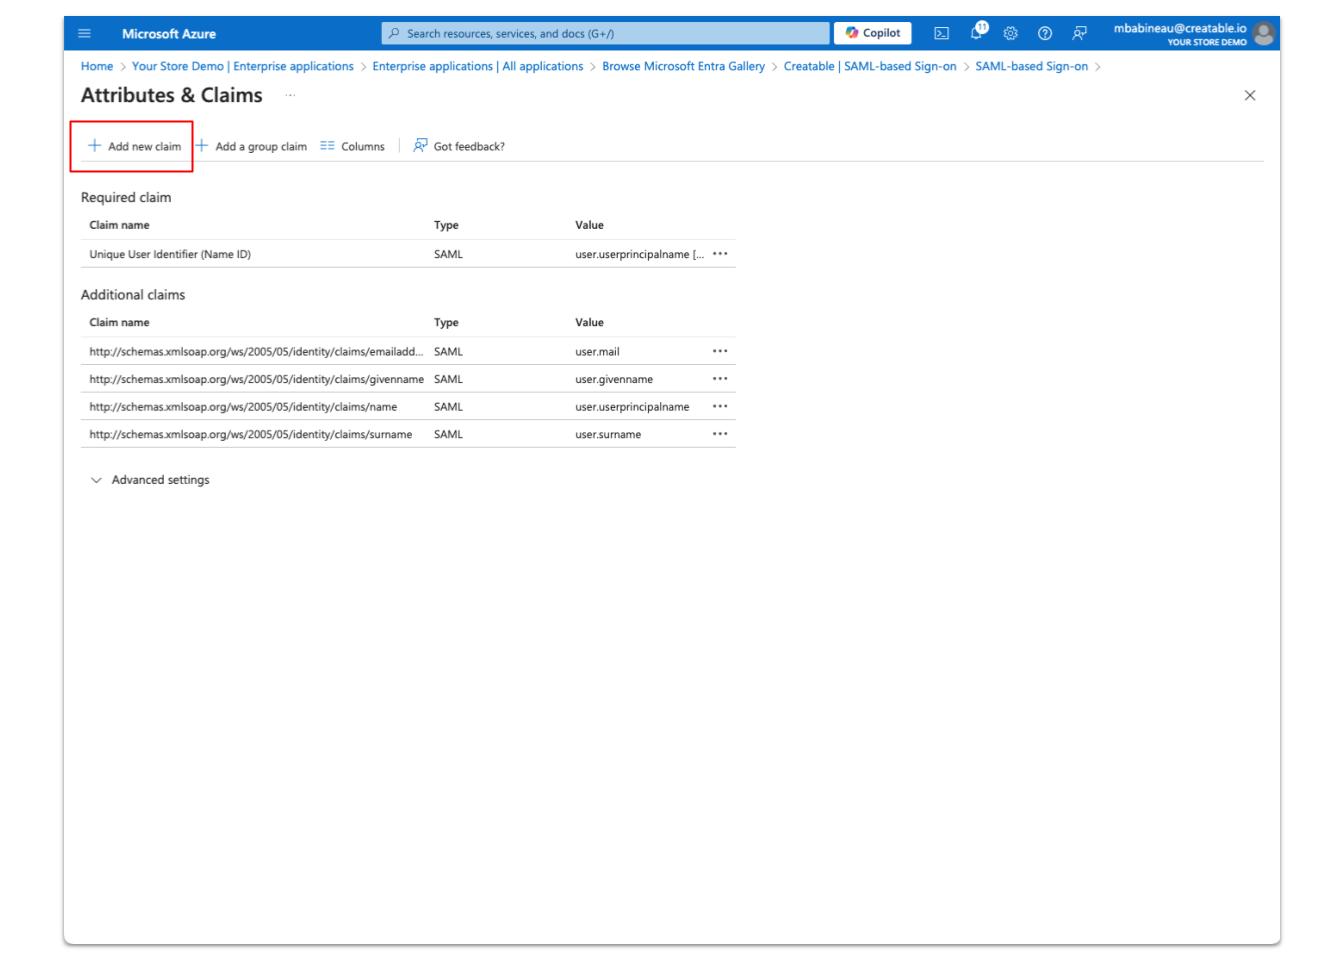
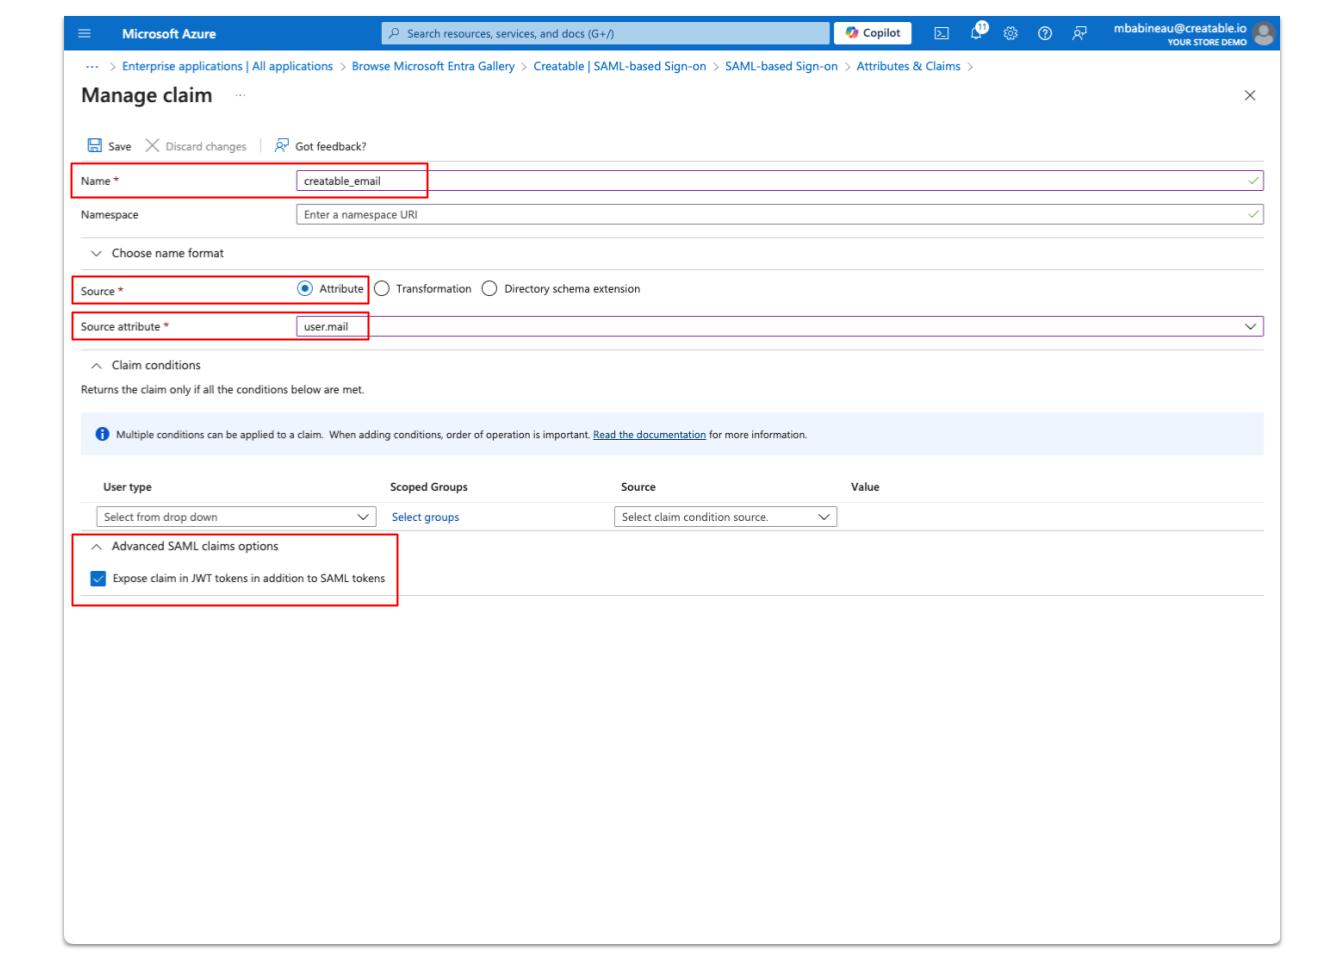
The “Manage claim” panel will open.
Fill out the following fields:
Name - this is important as this value is the value that shows up in the SSO response token. For a custom claim implementation, Creatable is looking specifically for the “creatable_email” claim. Per the Azure documentation it is recommended this be a unique value as to not create potential collisions for values that may already exist as claims, for example “email”.
Source - Ensure this is set to “Attribute”.
Source attribute - Choose “user.mail” or any available parameter that contains the email address of the user that corresponds with the email address of the user on Creatable. For example, if the email address of the user on Creatable is “creator-user@yourstoredemo.com”, then you would map the field that is used to store the value that corresponds with that email address.
At the bottom, expand the “Advanced SAML claims options” and ensure the checkbox is enabled for “Expose claim in JWT tokens in addition to SAML tokens”.
Click “Save”. You can close the Attributes & Claims panel.
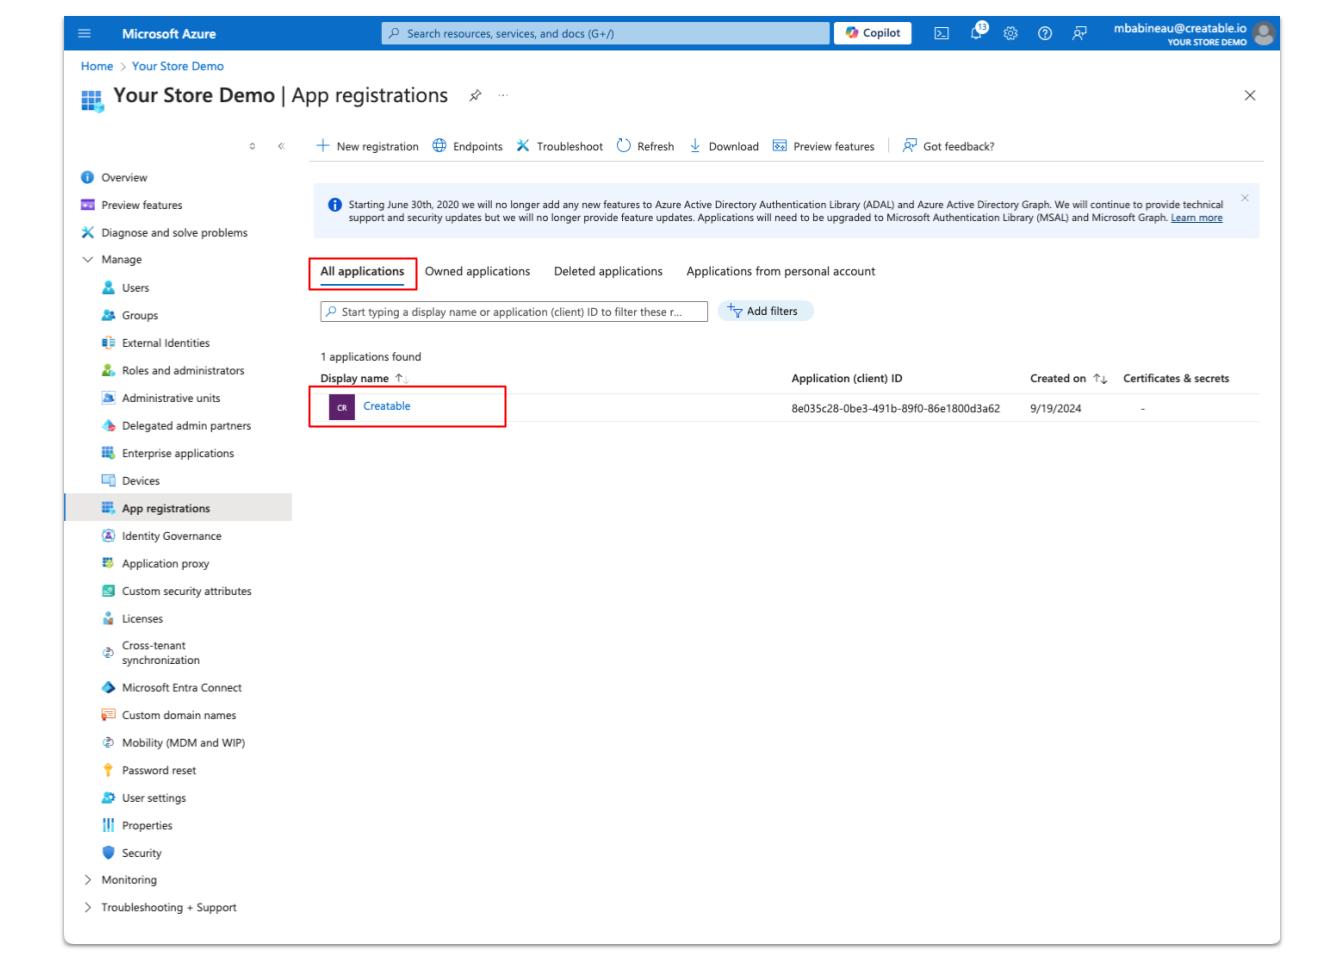
Finally, navigate to Microsoft Entra ID > App registrations.

Once the App registrations screen has loaded you may need to click the tab “All applications” to find the new app registration that was created by the enterprise application. Find the app registration and click on it.
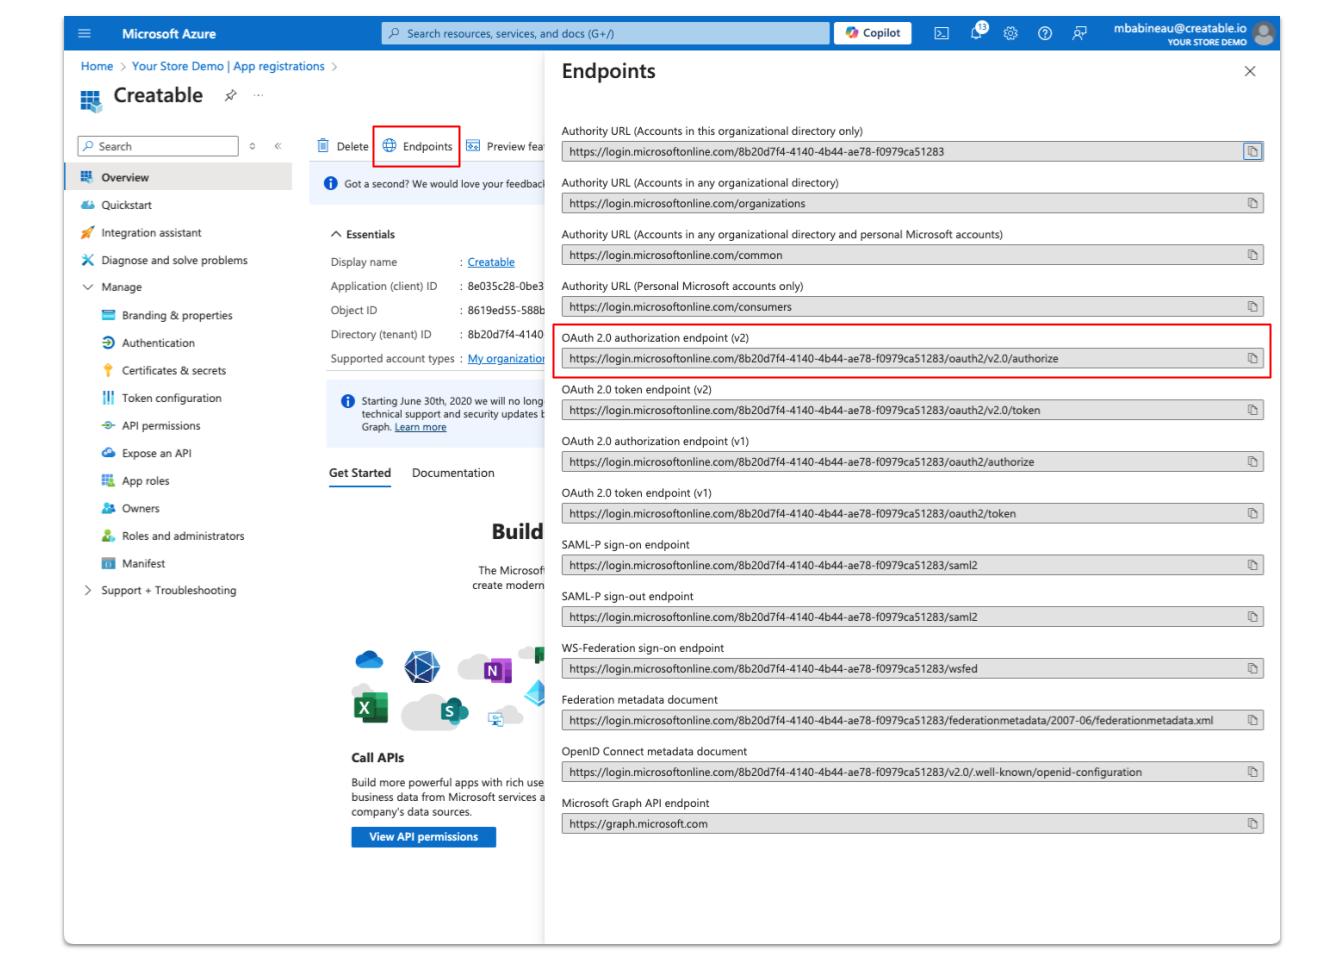
From the Overview screen, click on “Endpoints”. This will open up a panel of endpoints. Copy the “OAuth 2.0 authorization endpoint (v2). Provide this, along with the Application ID that was collected earlier to Creatable to complete the SSO configuration.
At this point, we have a working Enterprise application for SSO with custom claims. Based on your organization’s policies and procedures, some of these configurations may be performed differently, however this provides an example of how to enable custom claims in the SSO response token for Azure.
If you have any questions, please contact your client success account manager (support@creatable.io) for assistance and we will help troubleshoot any issues.
Building the Identity Provider URL
The following provides a breakdown of how the Identity Provider (IdP) URL is created.
https://login.microsoftonline.com//oauth2/v2.0/authorize
This is the OAuth 2.0 authorization endpoint v2 from the App registration > Endpoints panel
?client_id=
This is the Application ID of the Enterprise application that was created.
&response_type=id_token
This is the type of token we expect to receive.
&redirect_uri=
This is the Reply URL value provided from the Creatable dashboard. Note: leave the variable as is, it is automatically populated during runtime.
&scope=openid%20email%20profile
These are the requested scopes, there is no need to change this.
&response_mode=fragment
This specifies how Azure returns the authorization request, there is no need to change this.
&state=
Required by Creatable, there is no need to change this.
&nonce=
Required by Azure, there is no need to change this.
&max_age=0
Required by Creatable
A complete URL would look like this:
https://login.microsoftonline.com//oauth2/v2.0/authorize?client_id=&response_type=id_token&redirect_uri=&scope=openid%20email%20profile&response_mode=fragment&state=&nonce=&max_age=0